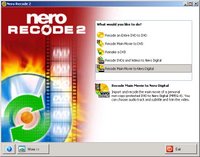
In order to convert from MPEG-2 to MPEG4, we need two pieces of software, DVD43 and Nero Recode. DVD43 is a freeware. Unfortunately, Nero Recode 2 is not. Nero Recode 2 is part of the Nero 6 Ultra Edition. Thankfully, you can download a 30-day trial of Nero Recode 2 to experiment with it. Important, Nero Recode can not access video files from a copy protected DVD. That’s where DVD43 comes into play. DVD43 removes the copy protection, allowing Nero Recode to access the DVD’s video files. Double click DVD43 desktop icon and it will detect all the optical drives on your computer. Once completed, you will see a yellow frown face icon on your system tray. Insert the DVD into the DVD drive and DVD43 will remove the copy protection. The yellow frown face will change to a little devil’s face and then to a green smiley face. If you see the green smiley face then DVD43 successfully removed the copy protection. On rare occasions, DVD43 will not be able to remove the copy protection in which case the yellow frown face will remain unchanged.
Once you have removed the copy protection, you can start using Nero Recode 2. Warning, the process takes a long time. Be sure to set aside a couple of hours before starting a project. Important, the time it takes to convert is directly proportional to the level of compression (i.e. more compression = more time to complete). Follow these steps:
Launch Nero Recode 2 and select Recode DVDs and Videos to Nero Digital.
In the new window, click on Import Files.
Navigate to the video files. Select the files you want and click on Add Titles.
Nero Recode will start analyzing the Title(s). Wait until the analysis is completed.
When completed, make sure the Fit to Target box is checked.
Next, select the level of compression by clicking on the bar directly below the Fit to Target box.
If you don’t like any of the preset choices then choose custom and enter the desired level of compression.
Press Next. Choose the destination of the converted video files. You can choose a HD or any removable media. Under Target folder, enter a folder on your HD where the files will be stored temporarily.
Press Burn.
Go hang out with your friends, do your laundry, jog around the park a couple of times or whatever until the process is finished.
1 comment:
Nero Express: a simplified incarnation of Nero Burning ROM targeted at beginners.that's cool, I think that it is the best Multimedia Suite!
Post a Comment